

API Keys
You need an API key to send requests to the Sitechecker Public REST API. Provide it
in the Authorization header when making requests:
Authorization: Bearer YOUR_API_KEYSend the key exactly as the dialog showed it: the scheme, one space, then the raw value. No quotes around it, no username in front of it, no prefix of your own.
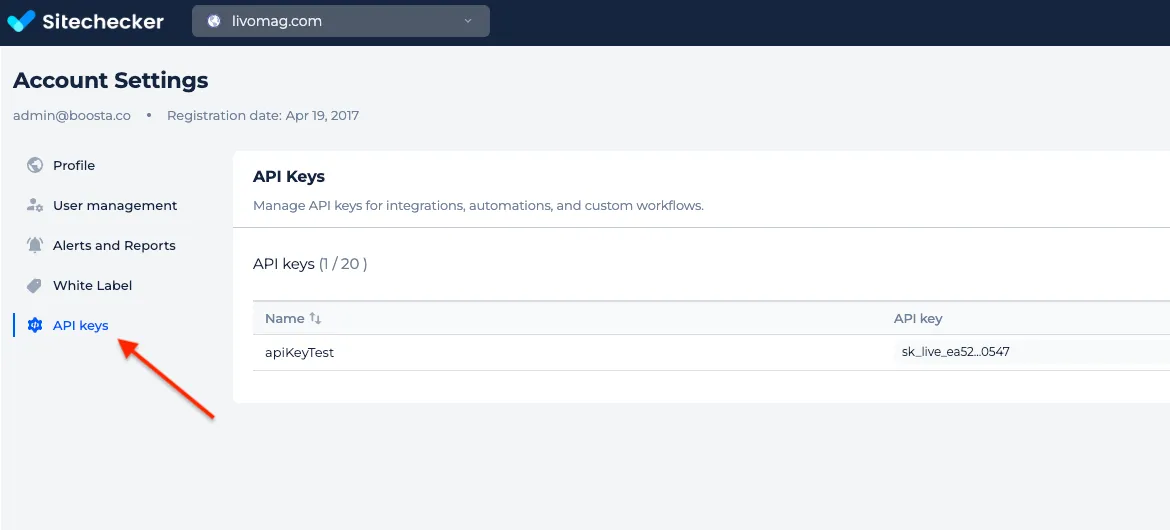
Keys are created and managed in Account Settings → API keys. A key inherits the access of the account that created it, so it can read the same projects and reports that account can — treat it like a password.
Creating an API key
Section titled “Creating an API key”-
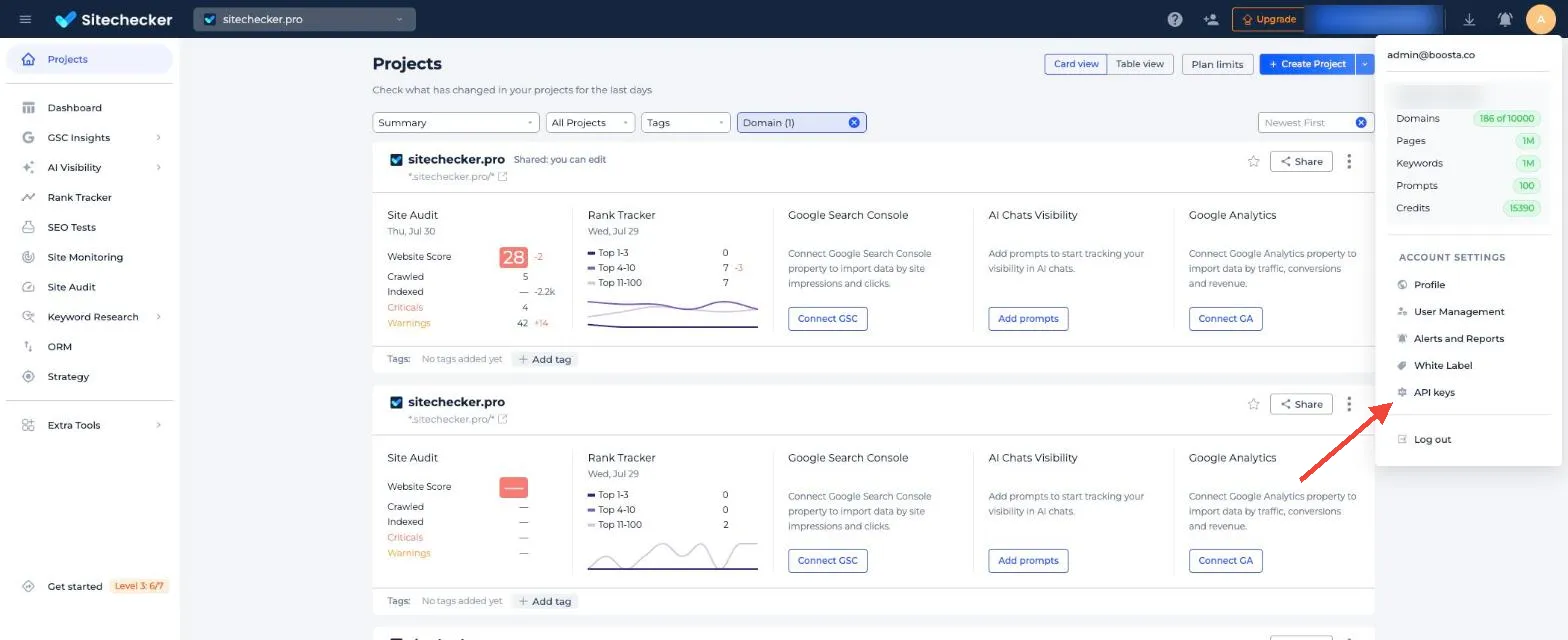
Open the account menu in the top right corner and select API keys.
-
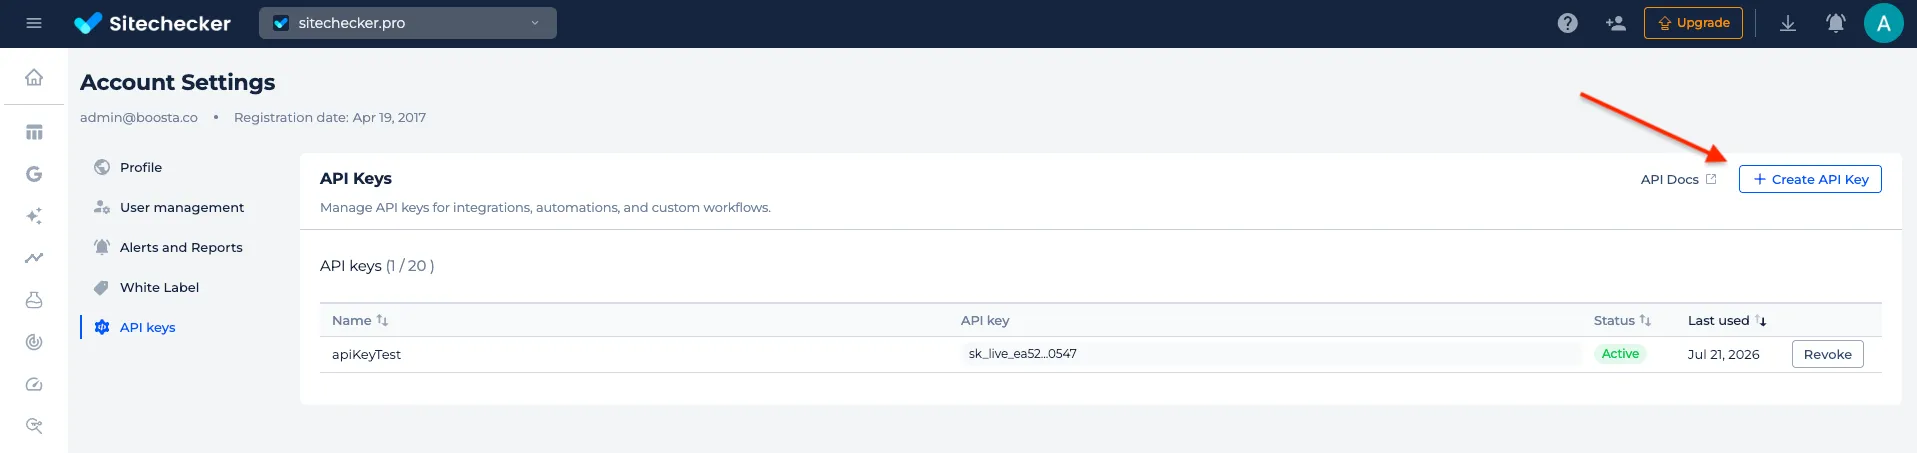
Click Create API Key.
-
Name the key (up to 60 characters) and click Create. Name it after the place that will use it —
production-crawler,looker-studio,n8n-automation— so you can tell later which integration a key belongs to, and revoke the right one.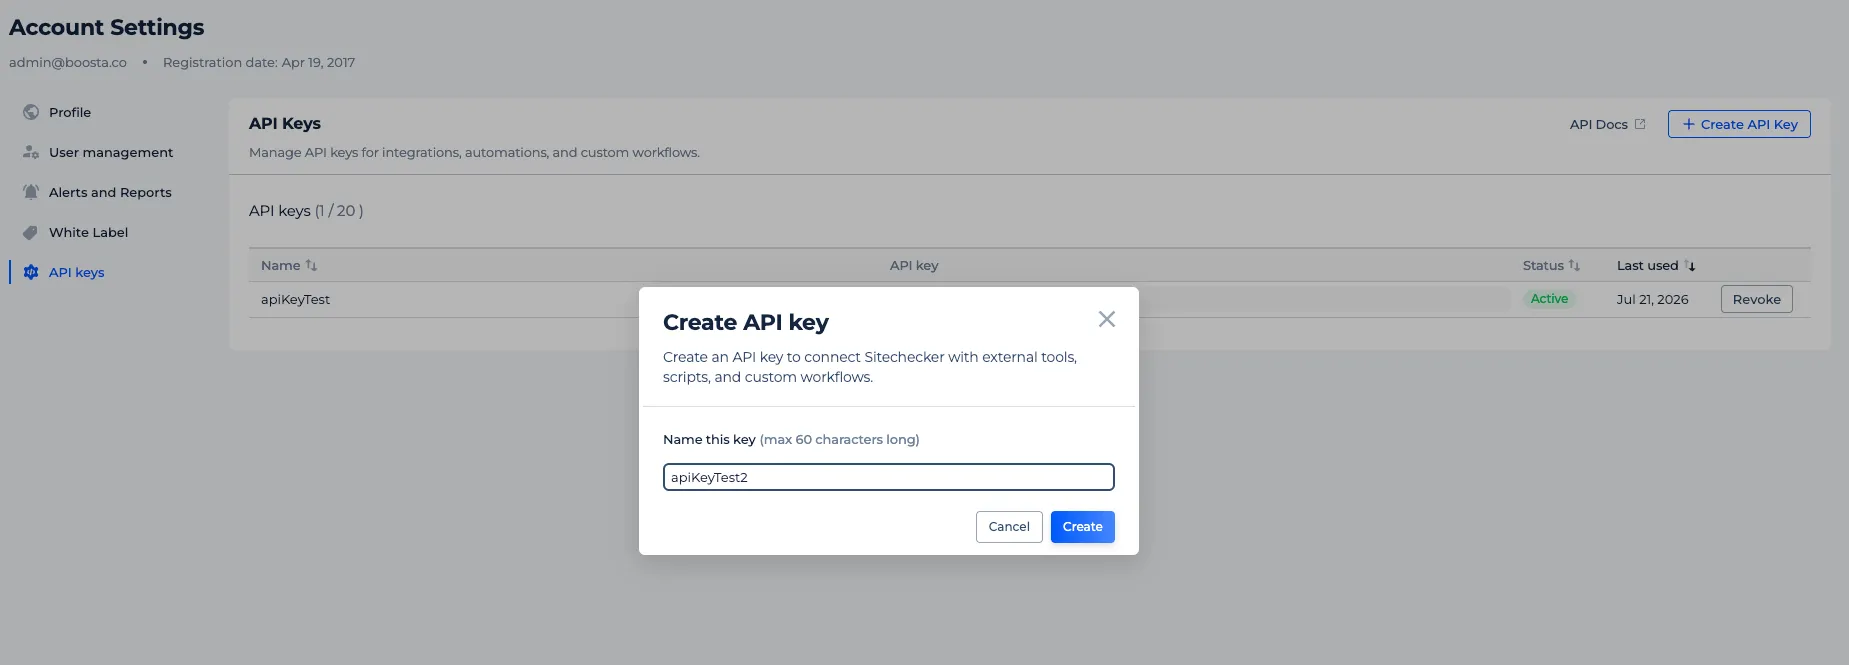
-
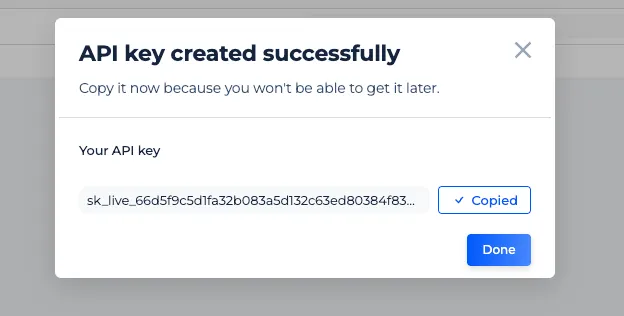
Copy the key, store it in your secret manager or environment variables, and click Done.
Storing keys securely
Section titled “Storing keys securely”A key stays valid until someone revokes it, so where you keep it matters as much as how you created it.
- Keep keys in environment variables or a secrets manager — not in the source.
- Never commit a key to Git or any other version-control system.
- Never expose a key in client-side JavaScript or in a mobile app bundle. Anything shipped to a device can be read off that device.
- Keep keys out of support tickets, analytics events, and application logs. These are the places credentials leak into by accident rather than by mistake.
- If a key may have been disclosed, rotate it: create a replacement, move the integration over, then revoke the old one.
Managing API keys
Section titled “Managing API keys”Give every integration its own key, and a separate one per environment. One key per consumer keeps Last used meaningful, and means revoking one integration’s key never takes another one down with it.
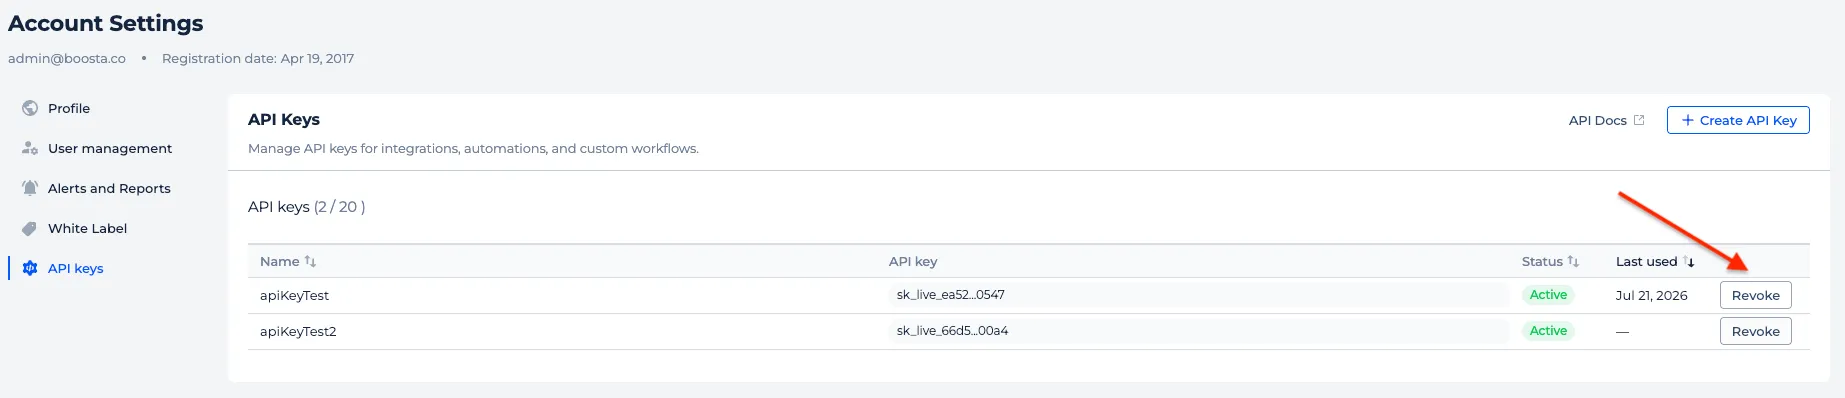
Every key of the account is listed on the same page, which holds up to 20 keys:
| Column | What it shows |
|---|---|
| Name | The name given at creation, so you can match a key to the integration using it. |
| API key | The masked key — the first and last characters of the value, enough to identify it. |
| Status | Whether the key is still accepted. Active keys authenticate requests; revoked ones do not. |
| Last used | The date of the most recent request made with the key, or — if it has never been used. |
Last used is the quickest way to find keys you no longer need: a key that has never been used, or has not been used in months, is a key worth revoking.
Revoking an API key
Section titled “Revoking an API key”Revoke a key when its integration is retired, when the person or system responsible for it changes, when the value may have leaked, or on the schedule your security policy sets for rotating credentials. Find the key in the list and click Revoke in its row.
Revoking takes effect immediately and cannot be undone. Every request that still
sends the revoked key fails with 401 and error.code REVOKED_API_KEY, so replace
the key in your integration first, then revoke the old one to avoid downtime.
Troubleshooting authentication
Section titled “Troubleshooting authentication”A 401 means the request was never authenticated, and error.code says which of the
two cases it is: REVOKED_API_KEY for a key that was revoked — issue a new one, this
key will not start working again — and INVALID_API_KEY for everything else. Work
through the header first — most INVALID_API_KEY responses are a transport problem,
not a key problem:
- the header is named exactly
Authorization; - its value starts with
Bearer— the scheme, then a single space; - the key carries no leading or trailing whitespace. A newline picked up when copying
the value, or left in a
.envfile, is the usual culprit; - the key is still Active in the list. Revoking takes effect immediately.
A 403 is a different problem, and points at the account rather than the request:
MISSING_PUBLIC_API_ACCESS means the account has no active API entitlement,
ACCESS_DENIED means the key cannot reach the project it asked for. Both are covered
in Access & Limits.
Next steps
Section titled “Next steps”- Make your first authenticated call — see Getting Started.
- Check what a key can reach and the limits it works under in Access & Limits.
- Browse the endpoints your key unlocks in the API reference.